PhotoCAD Hands-on
备注
重要说明:用户手册中的脚本布局不可能与 Python 脚本的格式完全一致,手册中的代码段落仅供参考。实际代码格式请参阅软件包中的 Python 源代码。
本部分适用于已安装 PyCharm (Python 3.8) 并熟悉如何使用 PyCharm 的用户。有关 PhotoCAD 的详细文档,请从 教程 部分开始。
获取 PhotoCAD 安装包后,解压缩并找到 “Installation Instructions.pdf” 文件,按照 “Installation Instructions.pdf” 中的详细说明进行操作。
按照安装说明成功安装 PhotoCAD 后,您可以继续以下操作,快速体验 PhotoCAD.
First look of the component unit script:
In the current project of PyCharm, find
External Libraries>site-packages>gpdk>components>bend>bend_bezier.pyfile and double-click it, it will open the python source code of Bessel type bend (as shown below):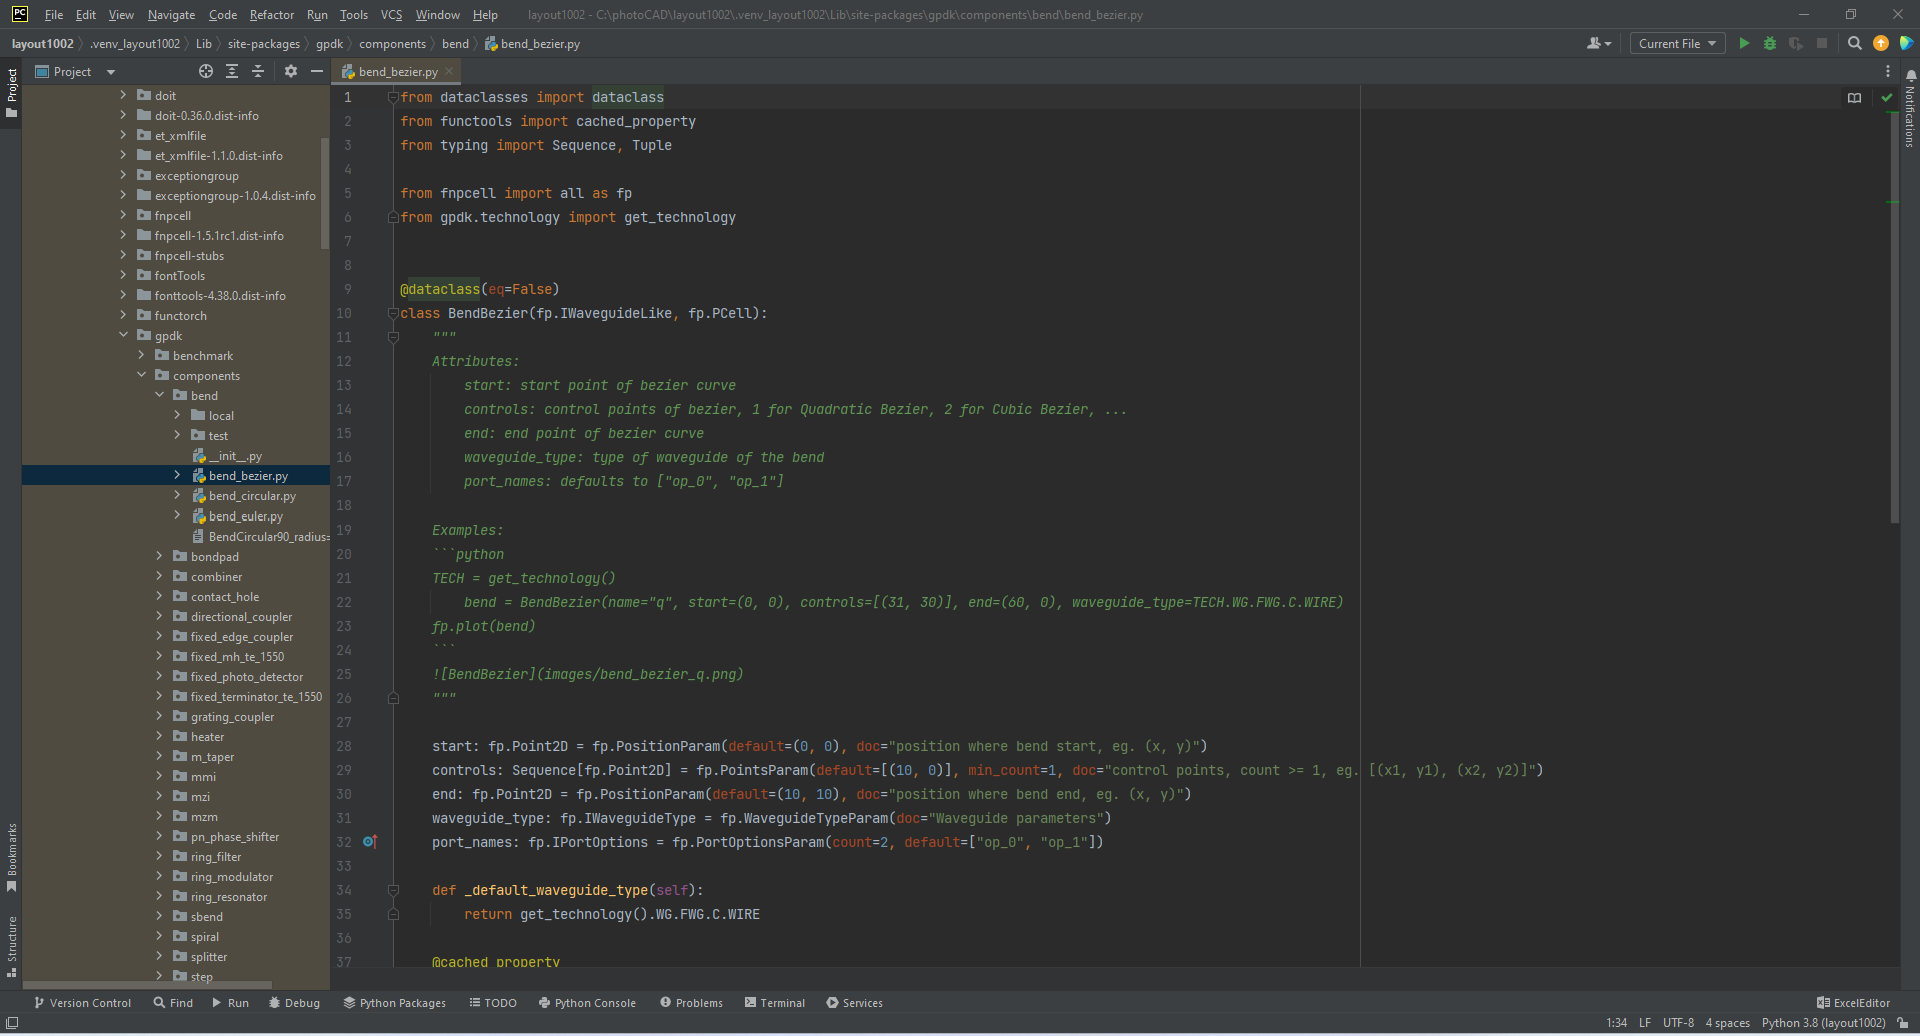
Run the script and view the layout:
After running
bend_bezier.py, a local folder will be generated undergpdk>components>bend, and thebend_bezier.gdsfile will be generated in the local folder (currently there is already a local folder under the bend folder, no new local folder will be created after running the script, and the generated file will replace the file of the same name in the local folder by default). Note that there are two common ways to run this script file.4.1. Click the right button in the code editing area, and then click
Run bend_bezieras indicated by the red arrow in the figure.
4.2 Make sure that the first red arrow shows
Current Fileorbend_bezierbefore clicking the button pointed to by the second arrow.
4.3 After running and succeeding, you can see the message shown below.

4.4 Use a layout tool such as KLayout to open the GDS file to view the device. In the Cell list, you can see two layout cells:
BendBezierandBendBezier_q. The current display isBendBezier_q.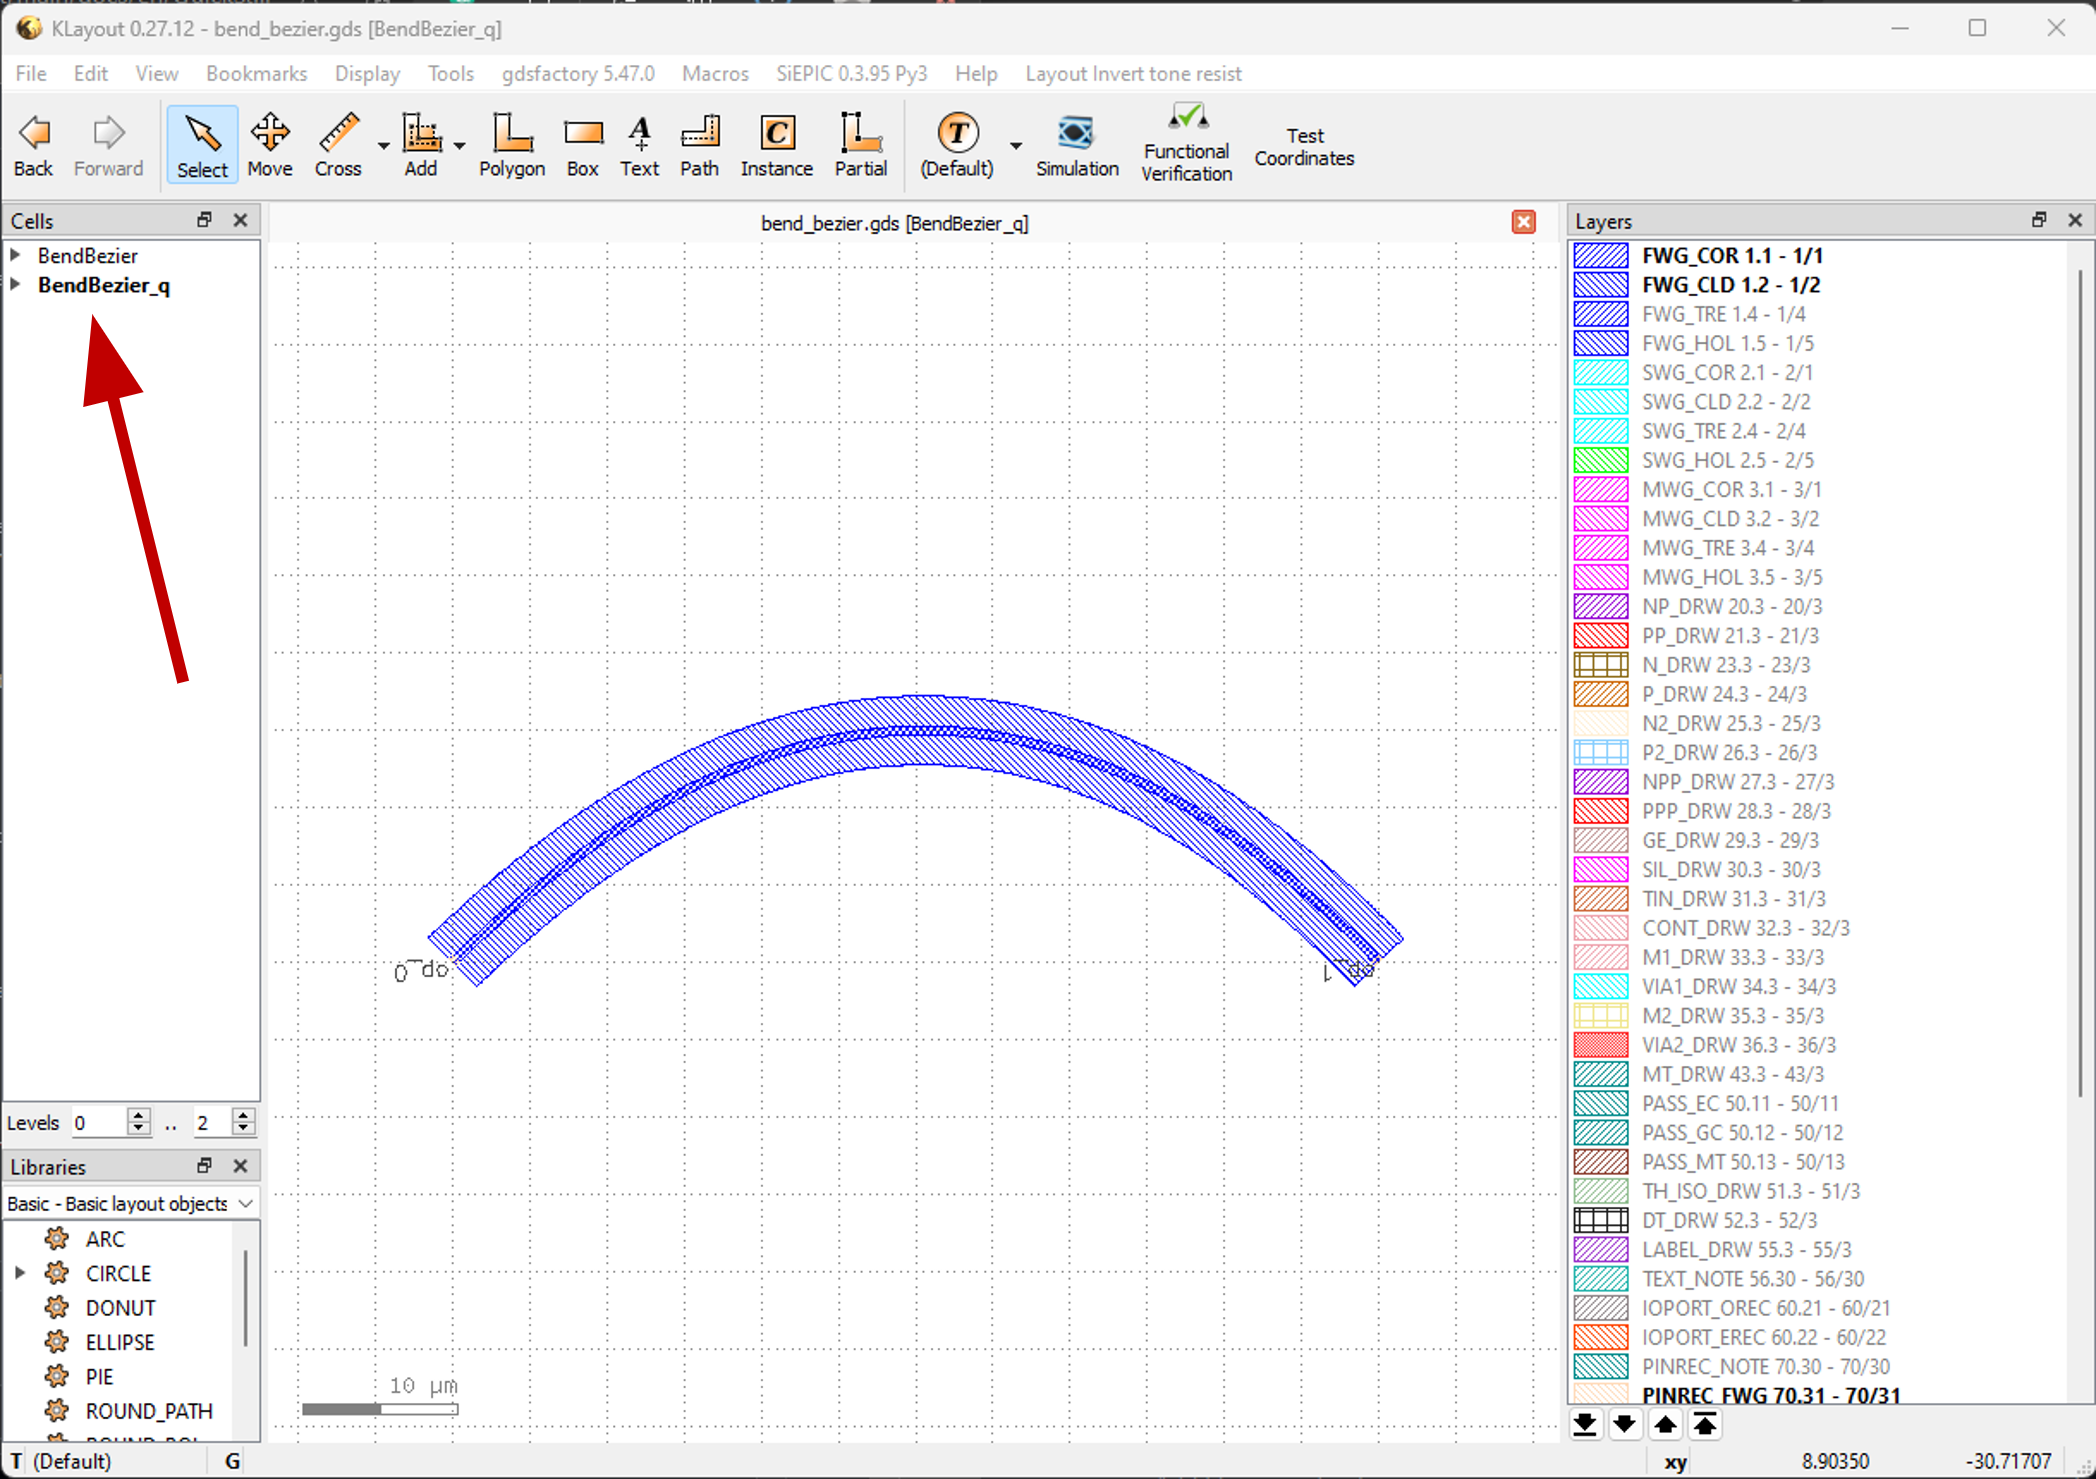
Use
classto create the corresponding device (instance).Viewing the
bend_bezier.pysource code in PyCharm, the source code creates two instances ofclass BendBezier()bylibrary +=:library += BendBezier() library += BendBezier(name="q", start=(0, 0), controls=[(30, 30)], end=(60, 0), waveguide_type=TECH.WG.FWG.C.WIRE), transform=fp.translate(0,40))
Where the first device is generated using the default parameters; the second device is generated using the following parameters:
name="q"                       Define the device specific name q;
start=(0, 0)                   Define the starting point of the Bezier curve as (0,0);
controls=[(30, 30)]            Define the Bezier curve passing through a control point (30,30);
end=(60, 0)                    Define the end point of the Bezier curve as (60,0);
waveguide_type=WG.FWG.C.WIRE   Defines the type of waveguide used for the curve;
transform=fp.translate(0, 40)) Defines the position of the layout cell with respect to the origin;
For a detailed description of the parameters of this device, please refer to the description in the python script shown in the figure:
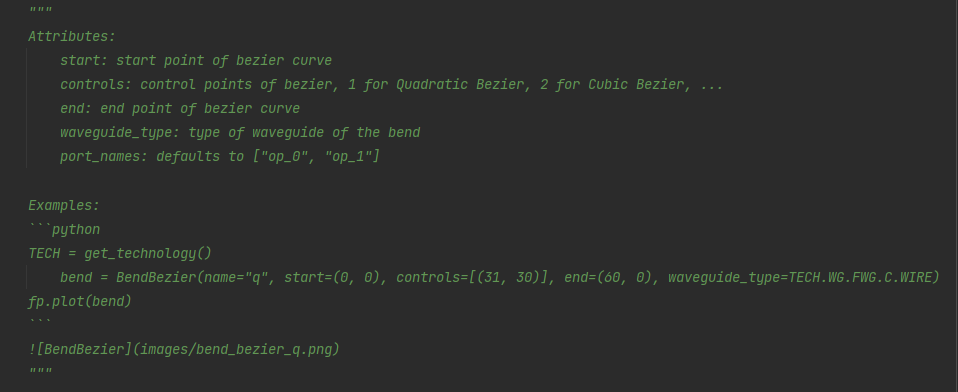
Try to modify the number of instances and parameters generated in the bend_bezier.py source code, and observe the changes in the shape of its layout.